How to use your Netlify domain as a subdomain for your Hashnode blog

Did you buy your Domain on Netlify, and now you want to use your domain with Hashnode as your blogging service?
Me too.
You can easily create a subdomain from your existing domain on netlify and connect it to your blog in 4 steps.
Step 1 - Choose your Netlify project and go to the domain settings
Go to your netlify overview page and choose the app with the domain you want to connect to your Hashnode blog.
If you are on the overview of your project, you have a "Domain settings" button.
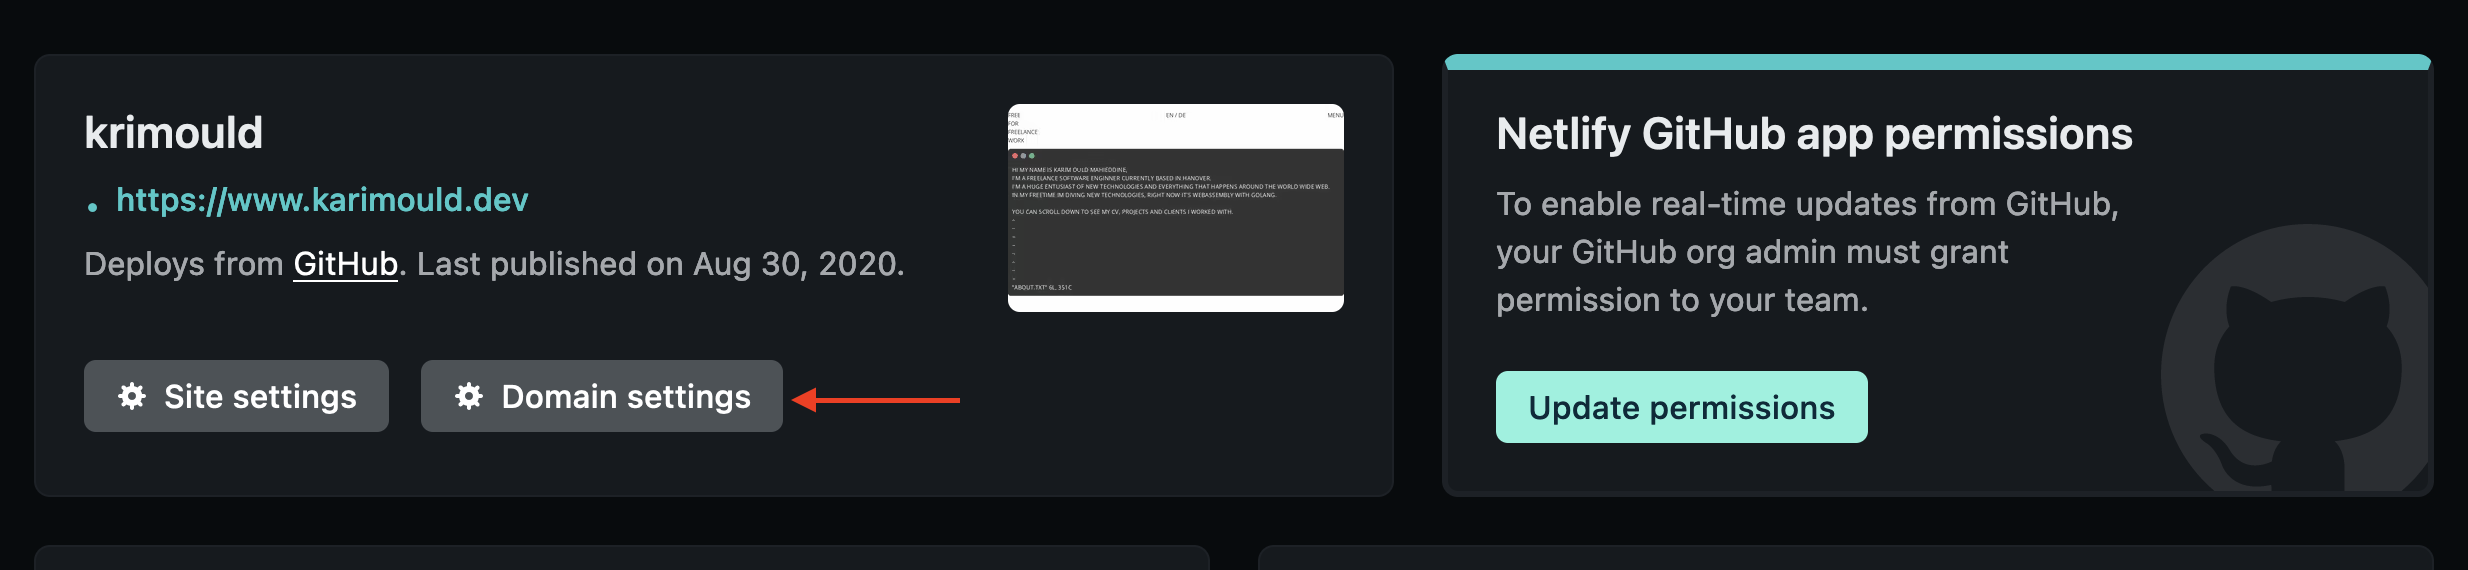
After clicking the button you see your Domain settings.
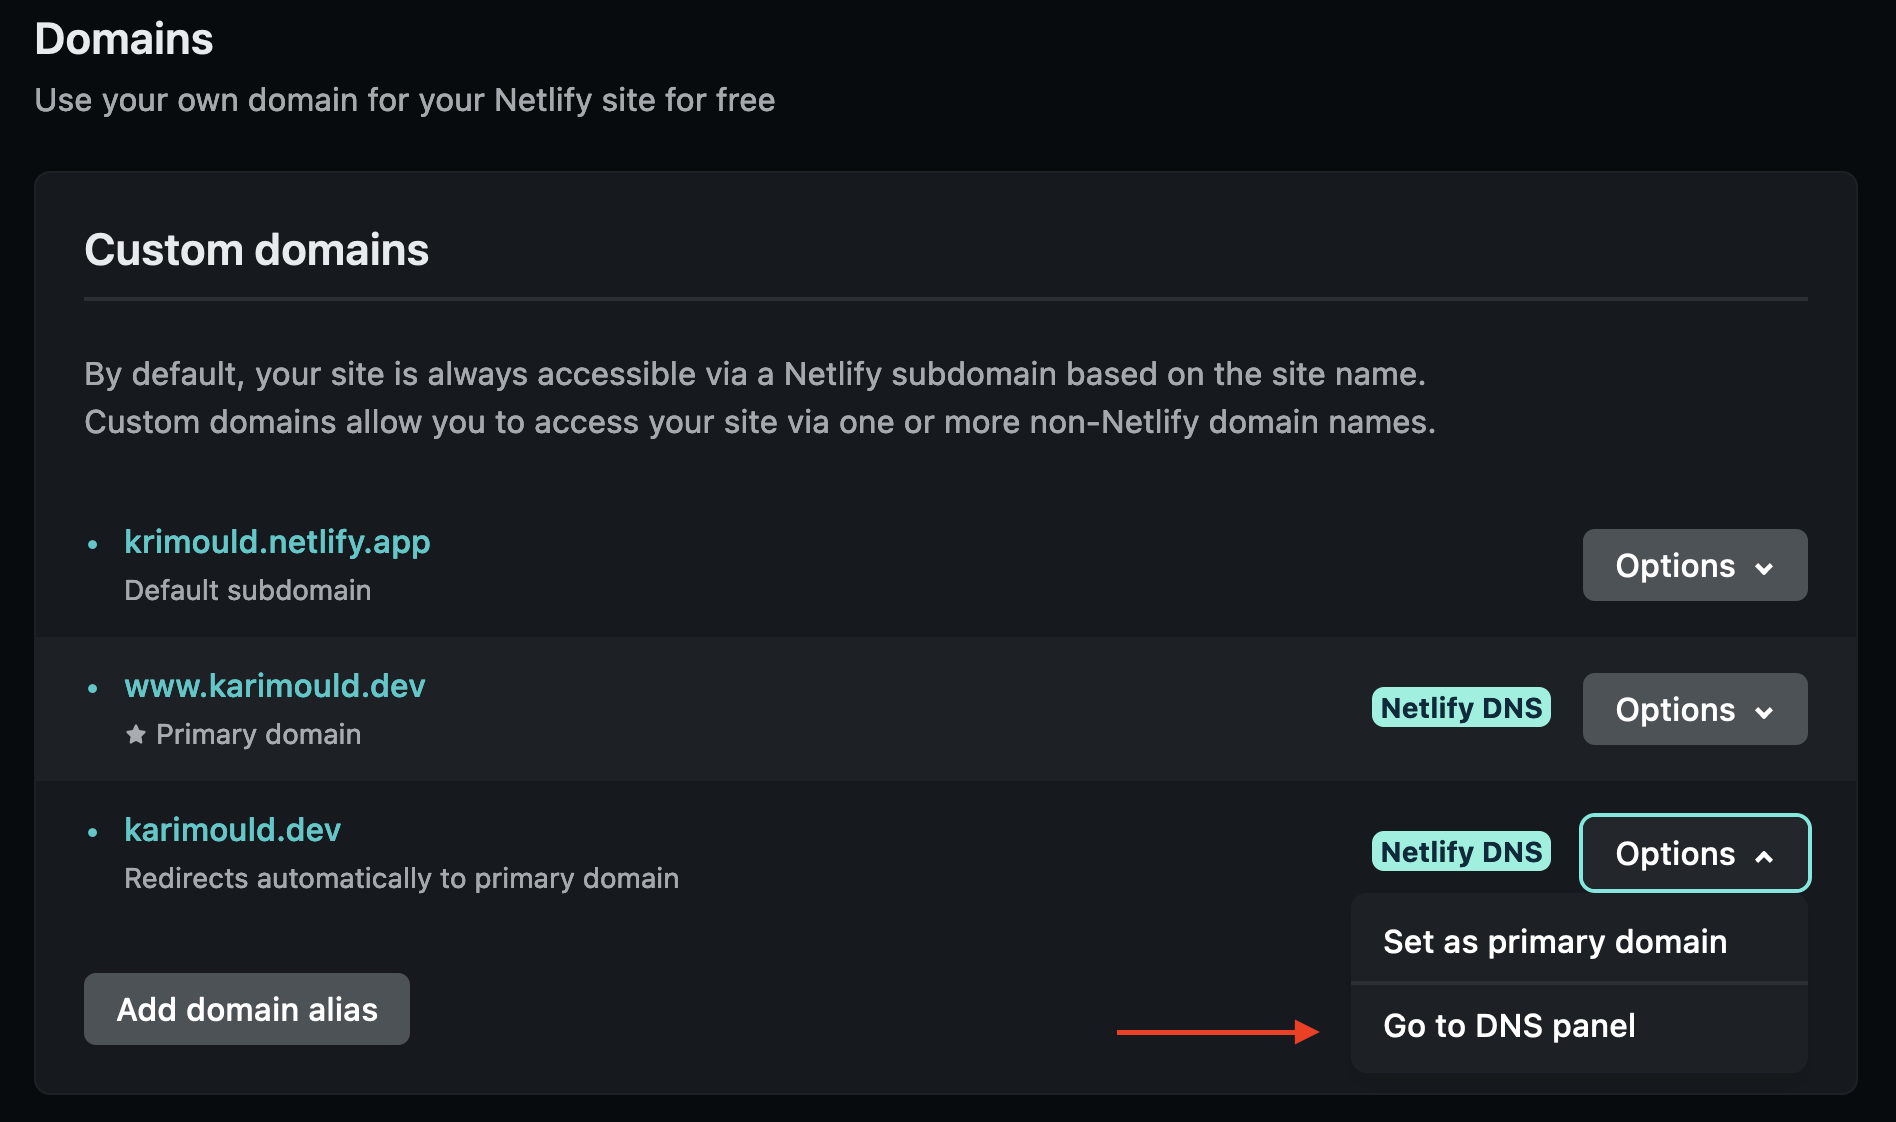
Step 2 - Go to your DNS settings
On the Domain settings page, you now see an "Options" dropdown next to your domain. If you click it, a dropdown opens with a button to go to your DNS settings.
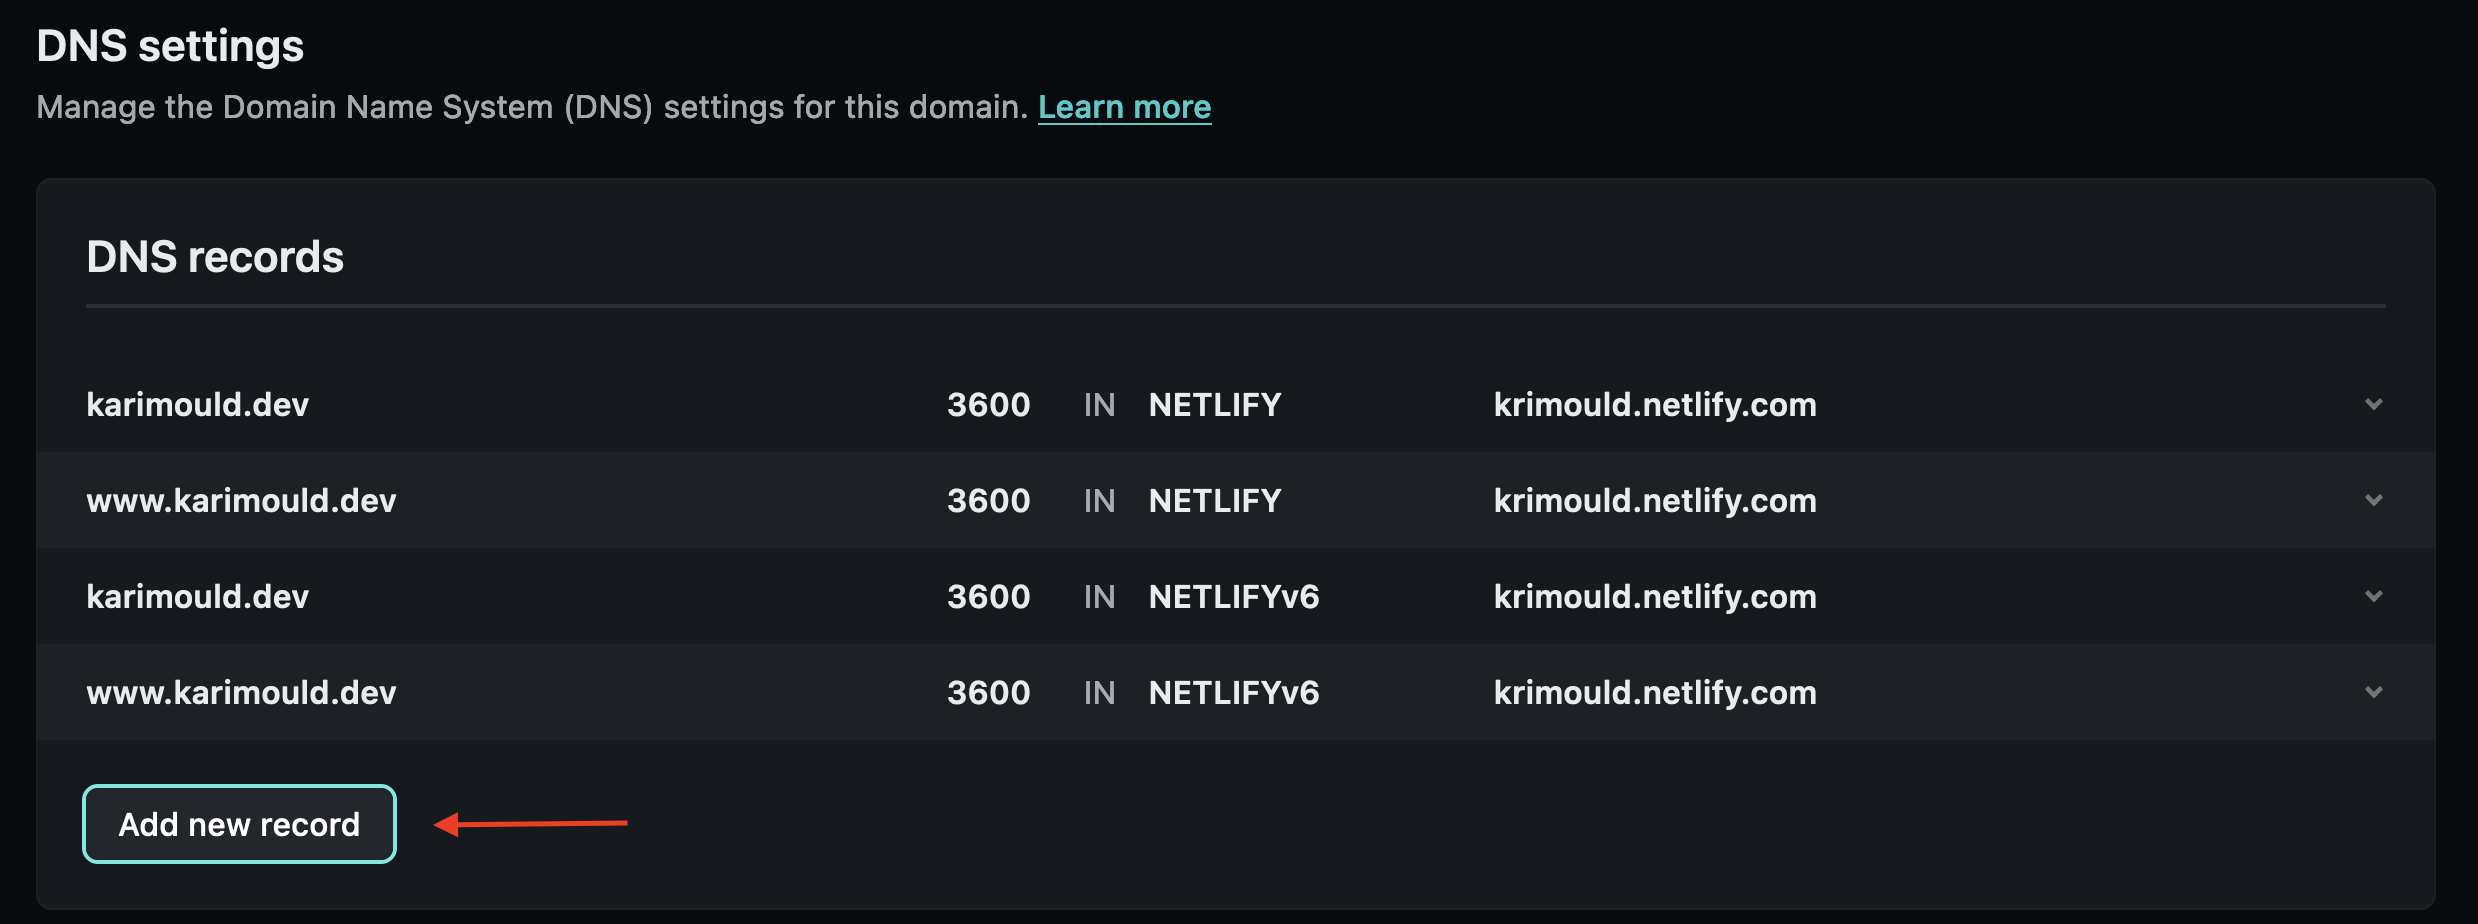
Step 3 - Add the Hashnode CNAME record
On the DNS settings page, you see a button "Add new record".
If you click it, a modal opens where you can add your CNAME record.
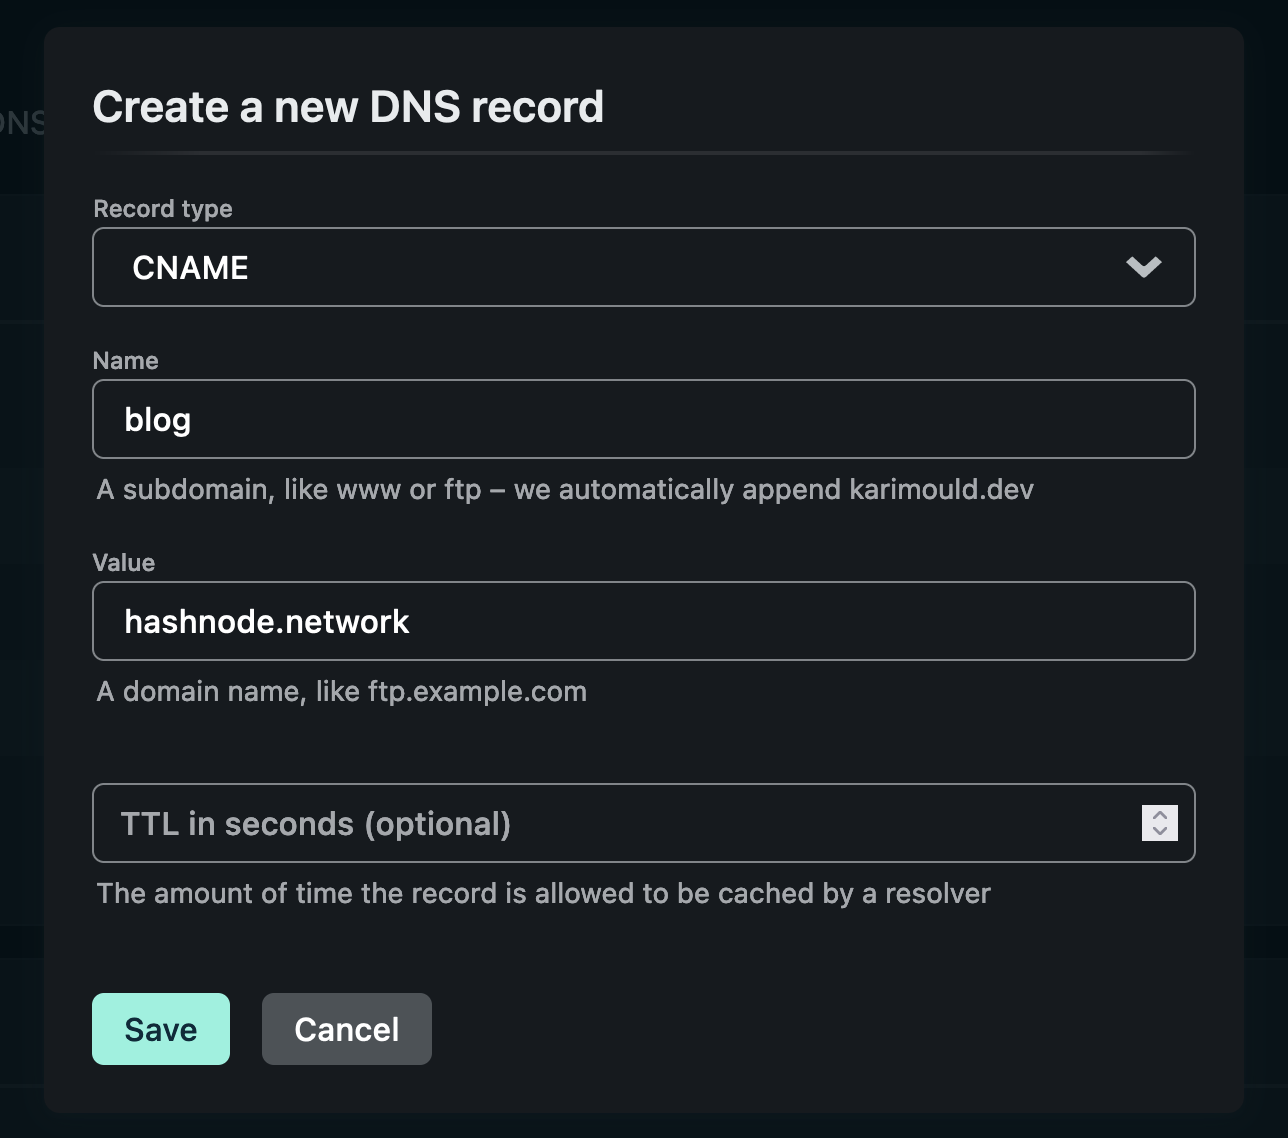
On Record type you select CNAME. In the field name, you put the name of the subdomain you want to connect to your blog.
For example:
If your domain is mydomain.cool and you chose the name "xyz", then your Hashnode blog can be accessed under the domain xyz.mydomain.cool.
In value, you have to put in: hashnode.network
If you want to know what a CNAME is you can read this Cloudflare blog about the DNS CNAME RECORD.
You can leave the field "TTL in seconds (optional)" empty.
When you have filled out all the fields you can click on the Save button to add the new CNAME.
Step 4 - Add your custom Domain to your Hashnode Blog
Go to your Hashnode blog's dashboard and click on "Domain" in the navigation. On the domain settings page, you can click on "custom domain".
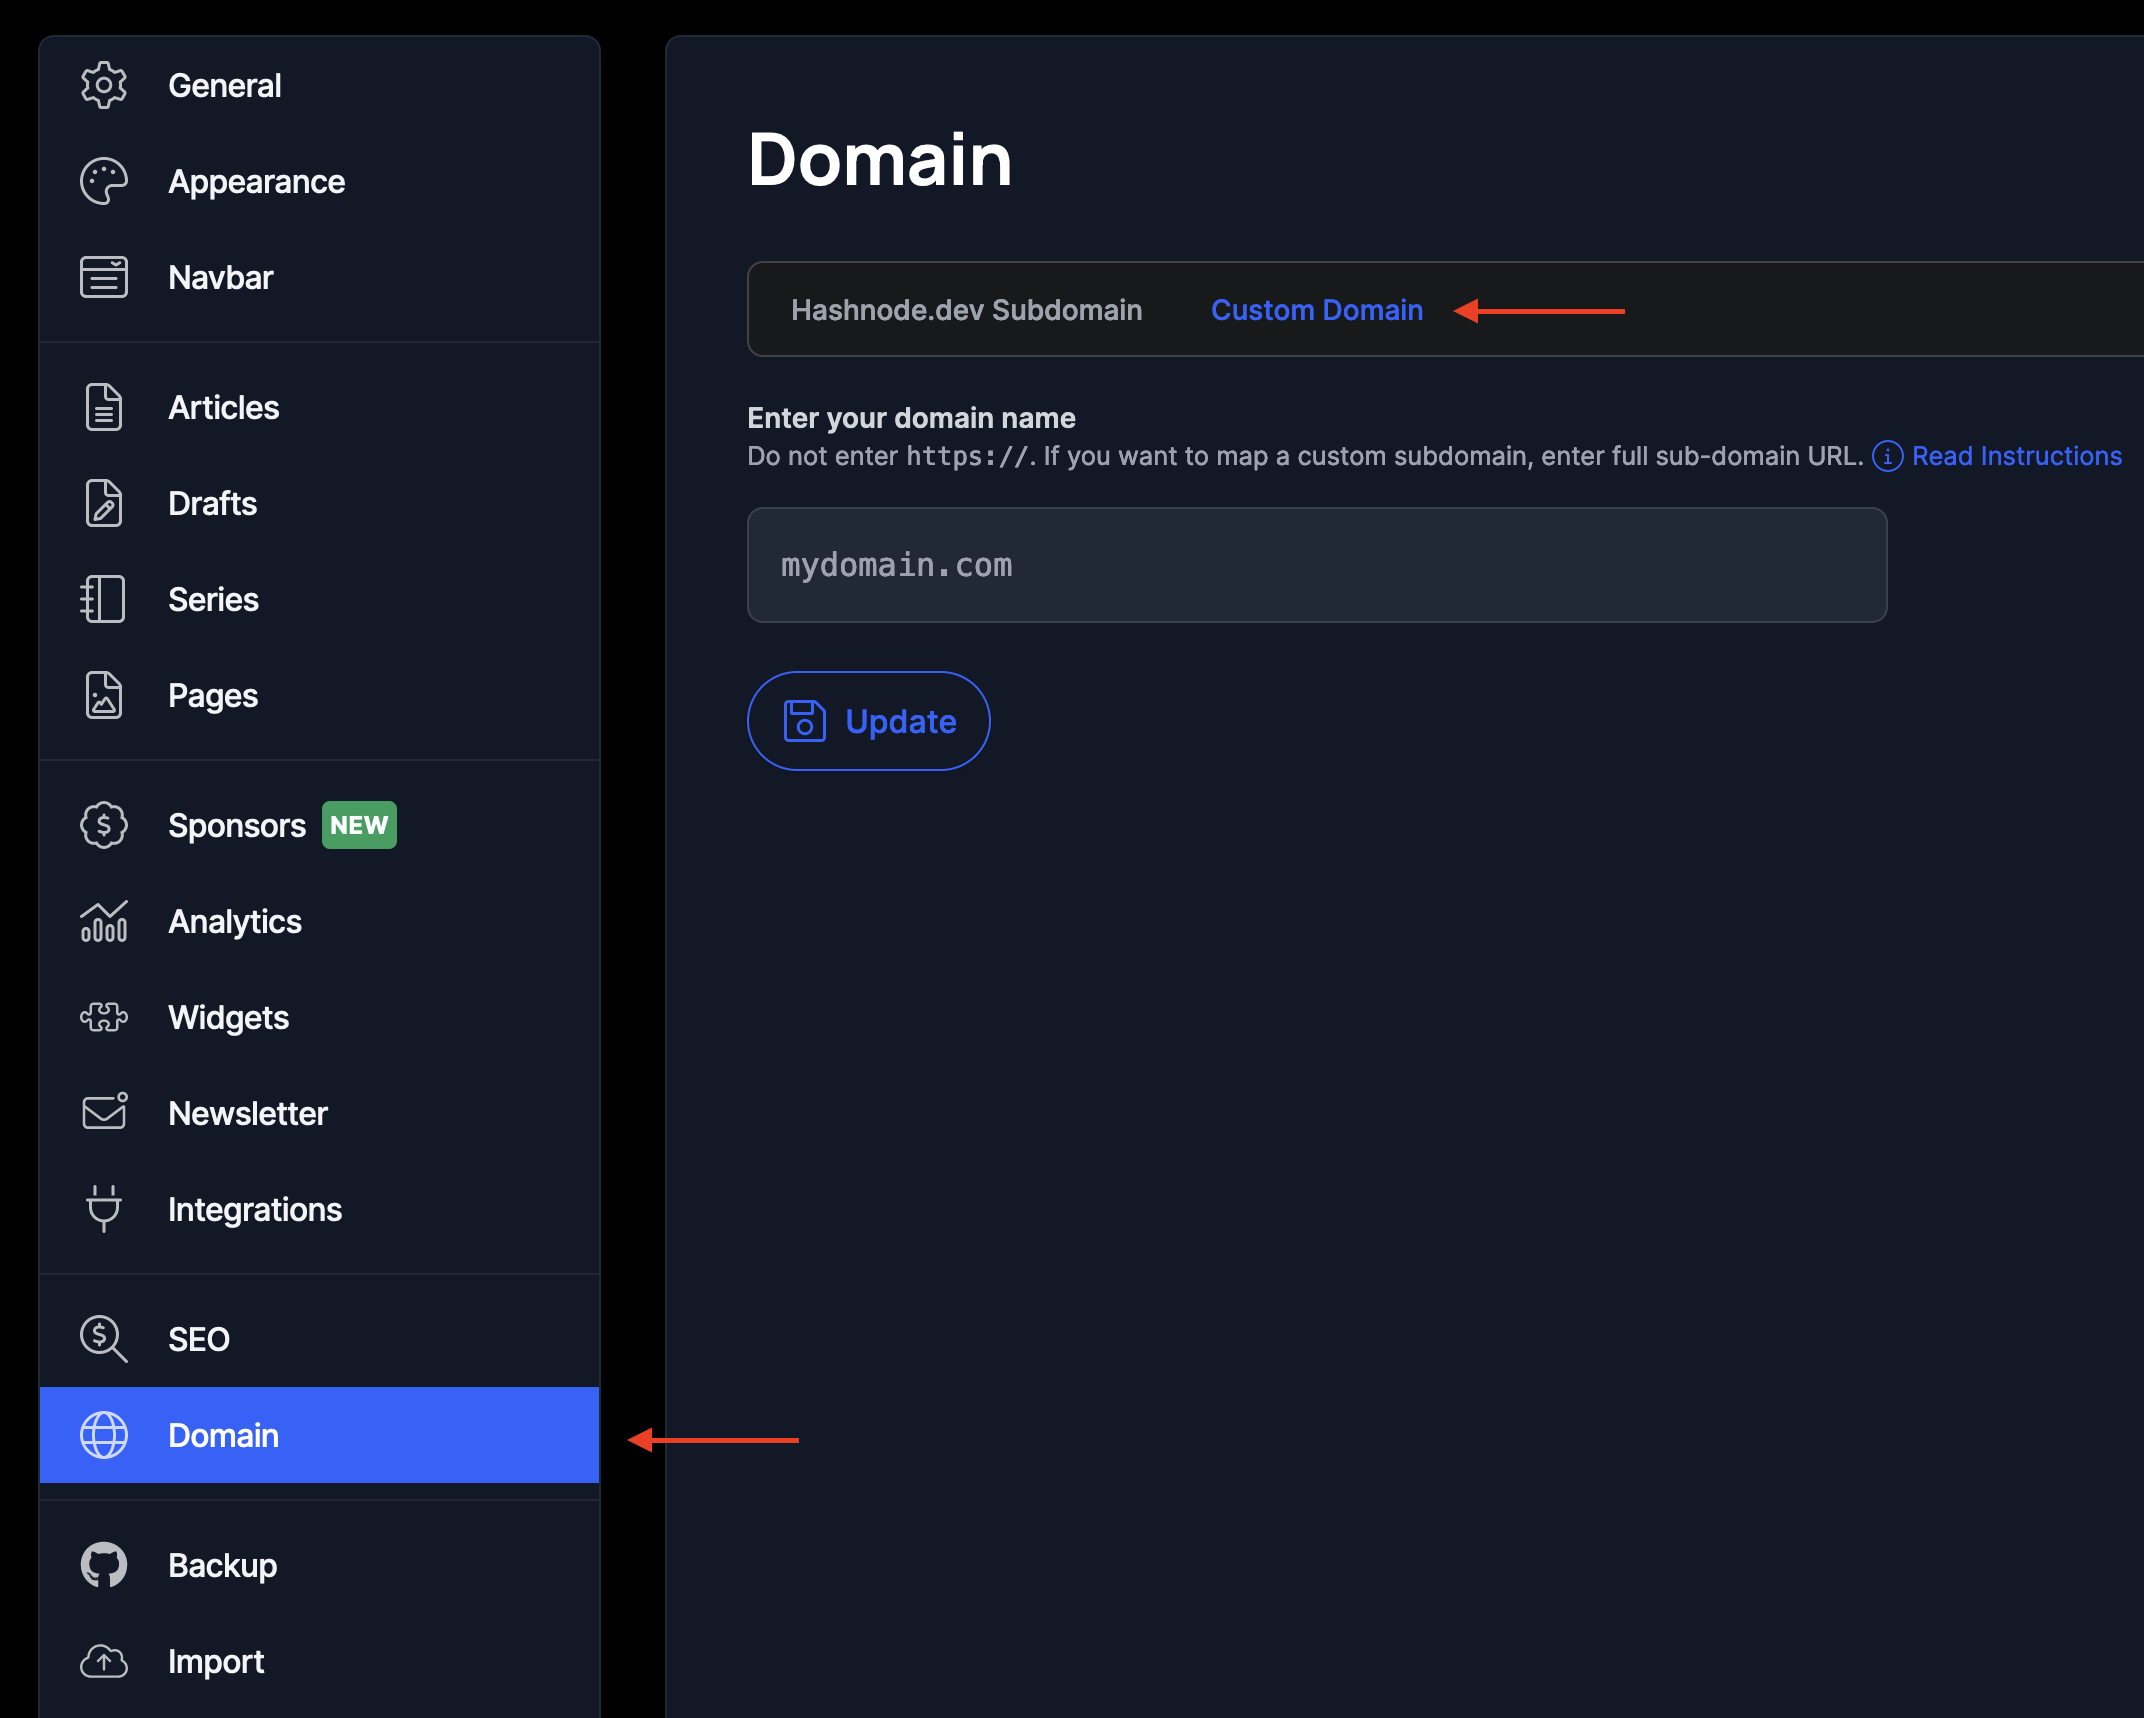
Then you have to enter the domain you created in netlify before in step three into the text field.
After that click on the update button.
If you clicked on the update button, you get redirected to a new overview page for your custom domain.
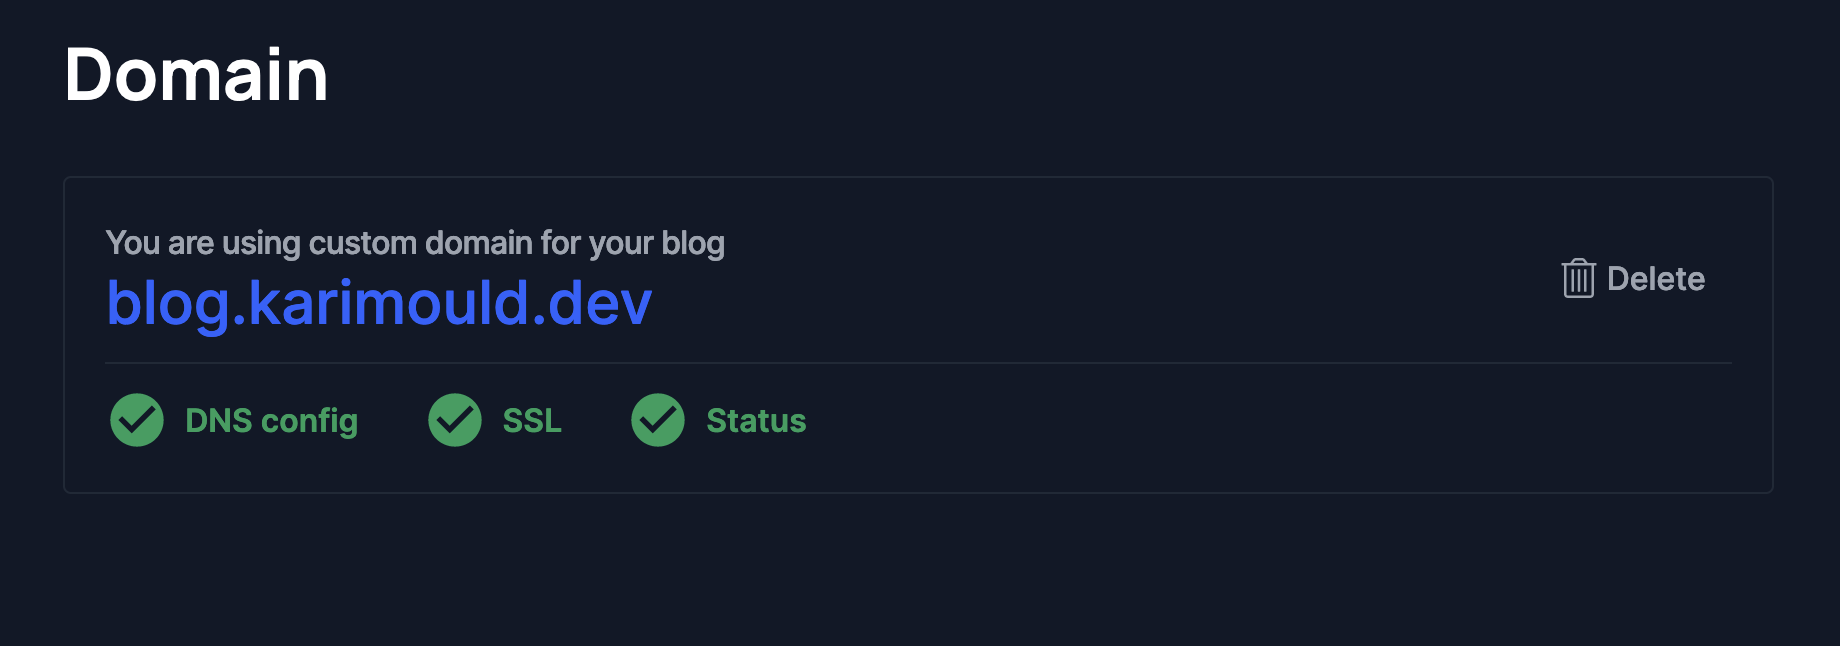
If one of the checkmarks is not green and still grey, you can click on refresh.
Note: After you added the new domain and the CNAME it can take up to 24 hours for your changes to be applied.
This is how you connect your domain which you bought on Netlify to your Hashnode blog.

